Learndash Migration on your mind?
Learn how to migrate LearnDash courses and lessons to the best WordPress LMS plugin, LifterLMS. Learndash is a great tool, but when you need more power and customizability, you can do a Learndash migration to LifterLMS.
There are many reasons people switch from LearnDash to LifterLMS mentioned in this Learndash vs. LifterLMS comparison post. You can also check out this Facebook thread where people discuss their decision to migrate from Learndash to LifterLMS.
We’d also like to give a quick shout-out to the founding team over at LearnDash and the web hosting company Liquid Web that acquired the Learndash product and its customers as well. The founders built a great product and we understand that different solutions work better for different people.
Key Takeaways
When you are ready to do your Learndash migration to LifterLMS, 2 tools are the most helpful with a Learndash migration to LifterLMS:
- Transfer (by Honors WP)
- WP All Import/Export Pro
This article walks you through exactly how to migrate from Learndash to LifterLMS using either Transfer or WP All Import.
Table of contents
Option 1: Learndash Migration to LifterLMS Using Transfer by Honors WP
Transfer is the premier import and export solution for LearnDash & LifterLMS. Effortlessly transfer your courses, content, & data between LMS platforms.
Watch the detailed video tutorial below and follow the steps below to use Tranfer to do your Learndash migration to LifterLMS.
Learndash Migration Tranfer Video Tutorial
In the ever-evolving landscape of digital education, transferring content between different Learning Management Systems (LMS) is a persistent challenge for educators and institutions.
The recent webinar hosted by LifterLMS, featuring James Tryon and Justin Pine from Honors WP, introduced a groundbreaking solution called Transfer that changes the game for Learndash migrations to LifterLMS.
The Challenge of LMS Migrations
Traditionally, moving courses, quizzes, and user data from one LMS platform to another involved a tedious process of manual transfer, often requiring extensive time and financial resources.
The Innovative Learndash Migration Solution: Transfer
The Honors WP and LifterLMS webinar showcased a new product designed to facilitate seamless migration between popular LMS platforms like LifterLMS and LearnDash. The Transfer tool not only migrates course content but also meticulously maintains the intricate web of data relationships, user progress, and other critical metadata.
Key Features and Benefits
- Effortless Course Migration: The tool enables the transfer of courses, lessons, quizzes, and more with ease.
- User Data Preservation: Crucial for maintaining continuity, Transfer ensures user progress and metadata are not lost in transition.
- Time and Cost Efficiency: What used to take hours and substantial financial investment can now be achieved more quickly and affordably.
- Backup and Undo Features: These features provide a safety net, ensuring data integrity throughout the migration process.
More Real World Applications of Transfer
The Transfer tool’s versatility extends beyond simple Learndash migrations platform migrations to LifterLMS. Honors WP’s Transfer can also be used for redesigning sites, archiving courses, and even resetting LMS data for new cohorts if you’re not using the LifterLMS cohort’s add-on.
Transfer’s backup feature is particularly beneficial for large-scale operations or for maintaining data integrity during significant site updates.
How to Use Transfer’s Learndash to LifterLMSLMS Migration Tool
This steb-by-step guide walks you through the process of migrating content and student data from one Learning Management System (LMS) to another.
Step 1: Preparing for Migration
- Select Your Source and Destination LMS: Identify the LMS platforms you are migrating from and to (e.g., from LearnDash to LifterLMS).
- Install the Migration Tool: Ensure that the migration tool is installed on both the source and destination sites.
Step 2: Exporting Data from the Source LMS
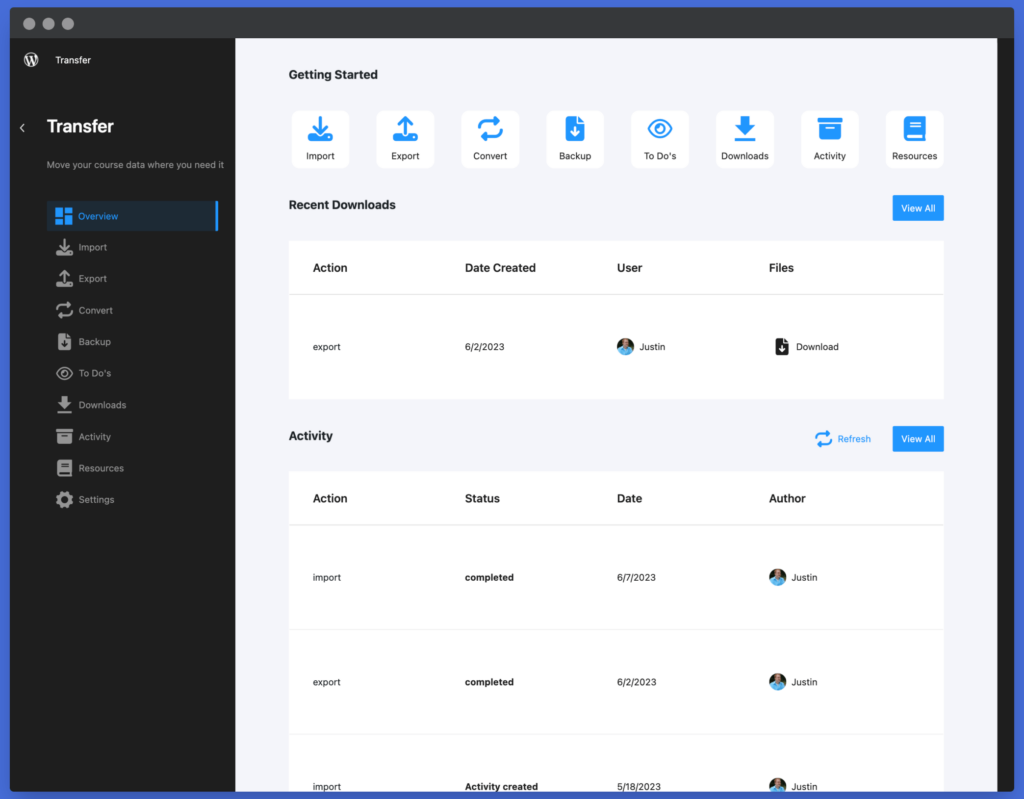
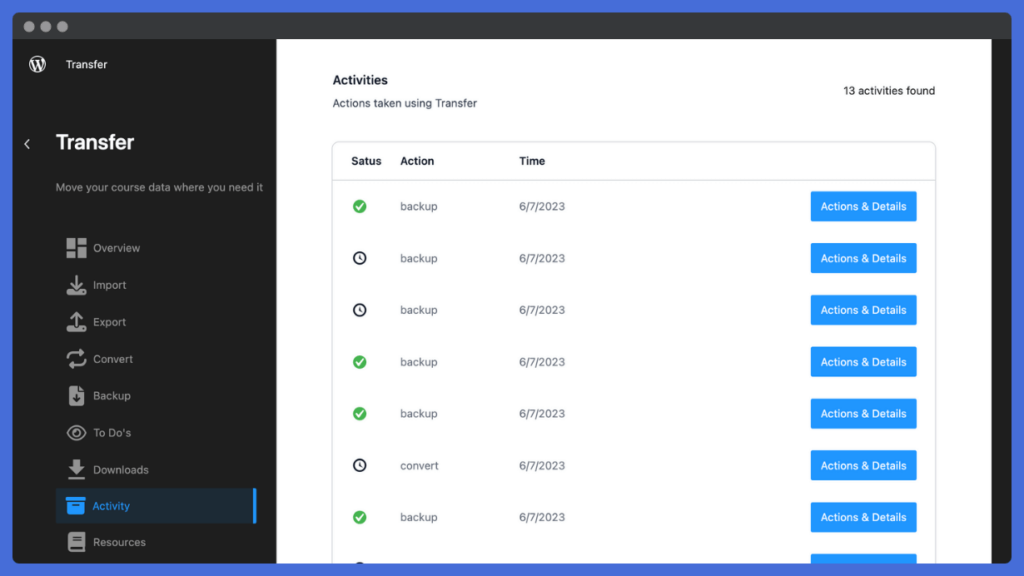
- Access the Tool on the Source Site: Navigate to the tool’s interface on your current LMS platform.
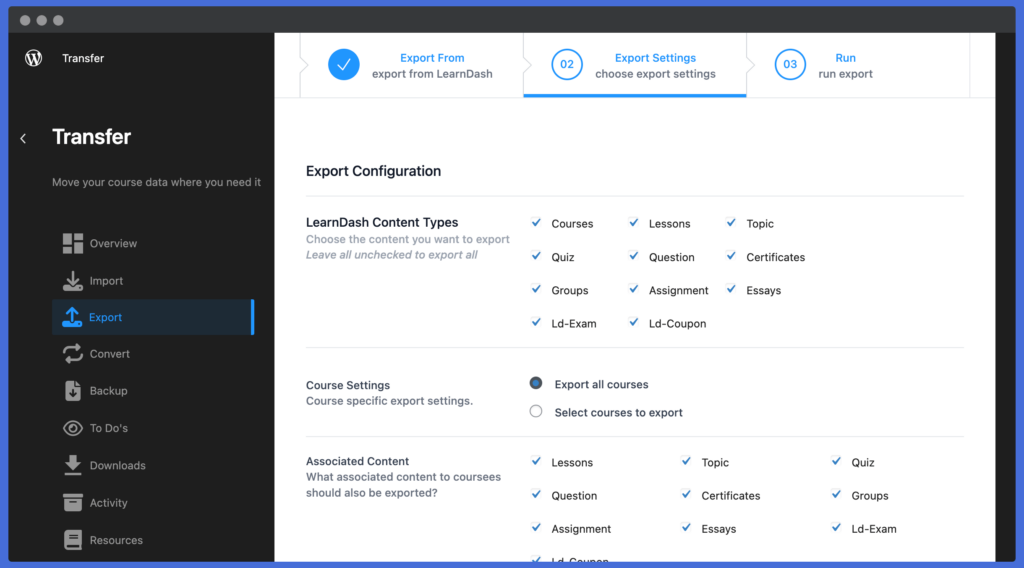
- Select Content for Export: Choose the courses, lessons, quizzes, and user data you wish to migrate. You can select all content or specific items.
- Initiate the Export Process: Click the export option, which will compile your data into a transferable format (typically a JSON file).
Step 3: Importing Data to the Destination LMS
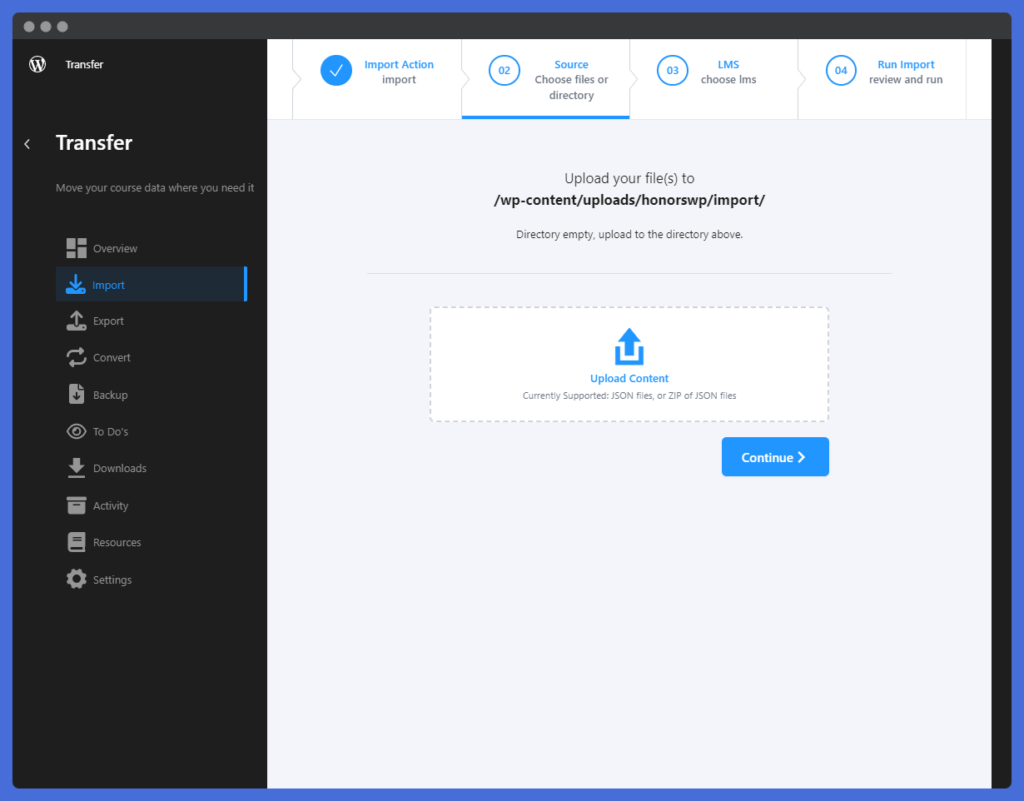
- Switch to the Destination Site: Log in to the LMS platform where you want to transfer the data.
- Upload the Exported File: Using the migration tool, upload the file you exported from the source LMS.
- Begin the Import Process: After uploading, initiate the import procedure. The tool will automatically map the content and user data to the new LMS structure.
Step 4: Verifying and Finalizing the Migration
- Check the Imported Content: Once the import is complete, review the courses, lessons, quizzes, and user data to ensure everything is correctly transferred and functional.
- Utilize Undo Features if Necessary: If any issues are observed, use the tool’s undo feature to revert the changes and troubleshoot as needed.
Step 5: Post-Migration Steps
- Clean Up and Optimize: If required, clean up any redundant data from the old LMS and make optimizations to the new platform.
- Test User Experience: Ensure that the user experience remains intact by testing course progress, quiz functionality, and other interactive elements.
Step 6: Backup and Safety Measures
- Regular Backups: Utilize the tool’s backup feature to create regular backups of your LMS data, ensuring data safety.
- Seek Support When Needed: In case of complex migrations or technical challenges, check out the Transfer documentation, and don’t hesitate to reach out to the Honors WP support team for assistance. You can also hire a LifterLMS expert to do the migration for you.
Additional Tips
- Always perform a trial run on a test environment before executing the migration on your live site.
- Keep your LMS platforms (both source and destination) updated to their latest versions to ensure compatibility with the migration tool.
- Consider the size of your export file and the hosting environment’s limitations, adjusting your approach as needed.
Get Transfer by Honors WP
Honors WP is a leading innovator in the WordPress LMS ecosystem.
Get Transfer from Honors WP today for your Learndash Migration to LifterLMS.
Option 2: Learndash Migration to LifterLMS Using WP All Import
Transfer is our top recommendation for Learndash migrations to LifterLMS because it can migrate student data, not just content.
But if you are just trying to move LMS content like courses and lessons, WP All Import is another great Learndash migration tool.
Learndash Migration to LifterLMS Overview with WP All Import
This tutorial uses the WP All Import/Export Pro plugin package to export LearnDash content from courses and lessons and import it over into LifterLMS.
If you are ready for a Learndash migration to LifterLMS, here are the exact steps in the video tutorial and screenshot/text instruction format below…
Migrate LearnDash Courses and Lessons
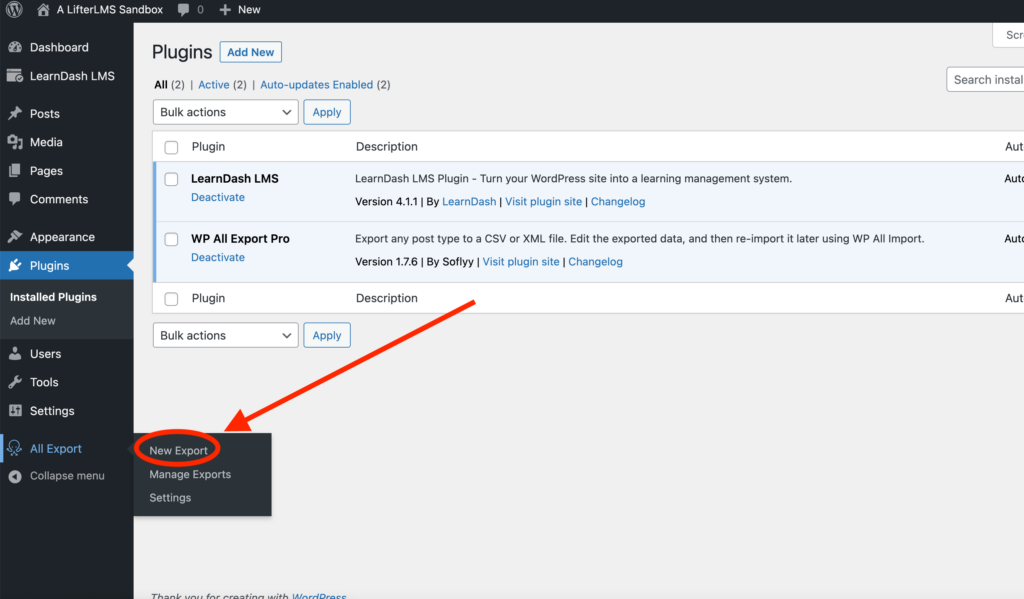
Step 1 – Purchase, download, and upload the WP All Export Pro plugin to your LearnDash website.
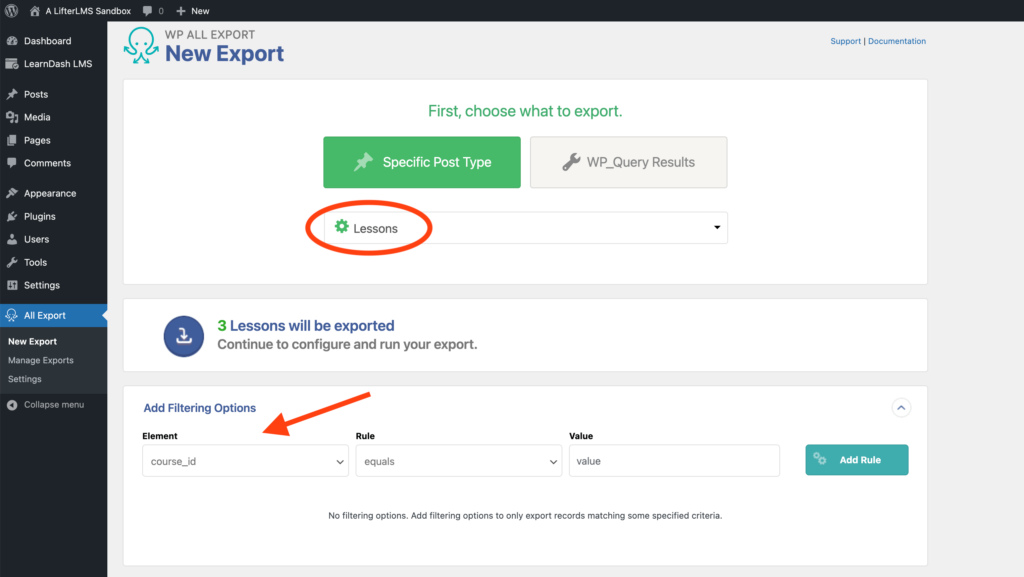
Step 2 – Navigate the wp-admin > All Export > New Export.
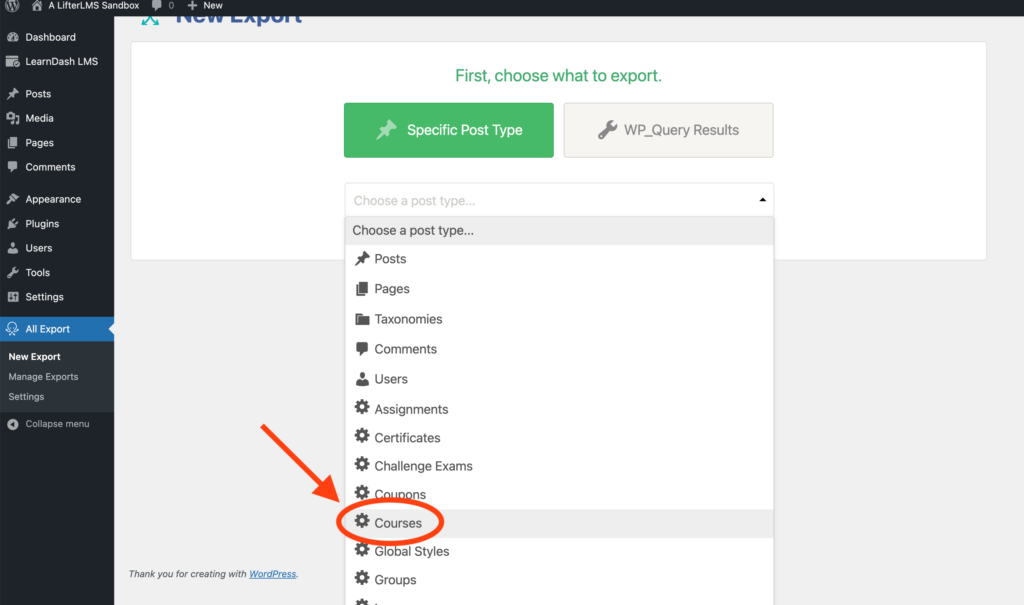
Step 3 – Select the Specific Post Type > Courses.
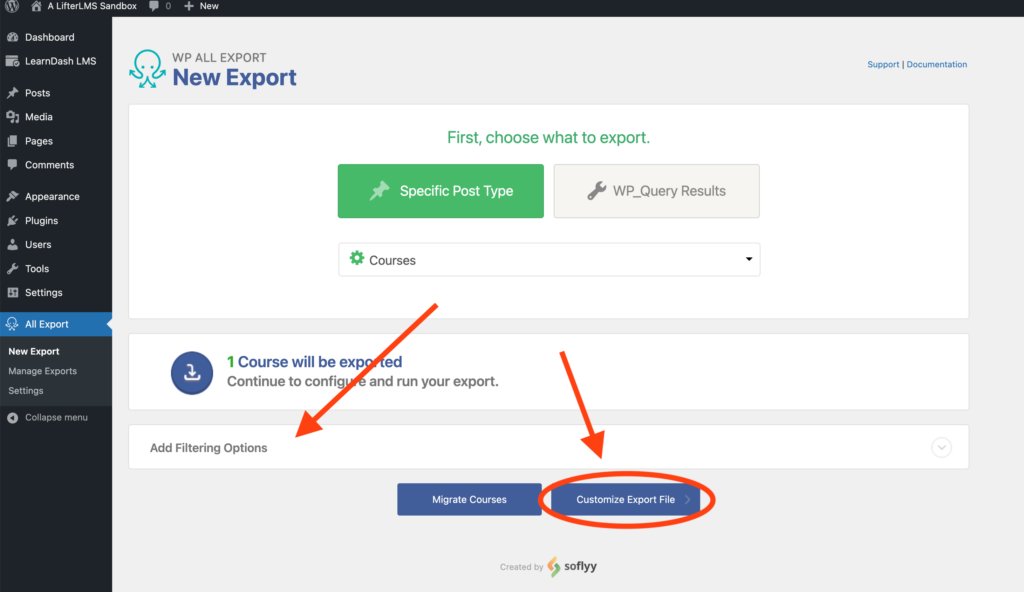
Step 4 – Add any filtering options if you’d like a specific export, then move on to the next step Customize Export File.
Step 5 – Add any Available Data you’d like from your lessons to your export file, and click Continue.
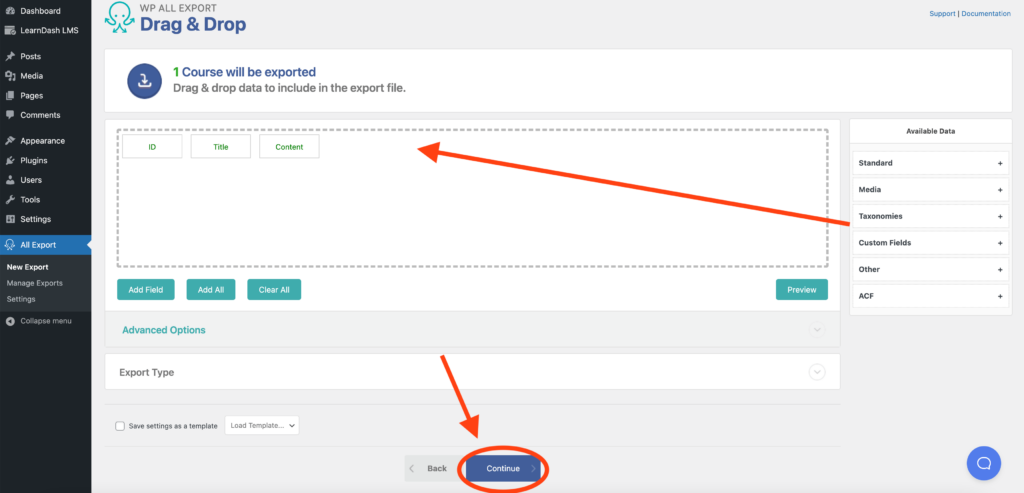
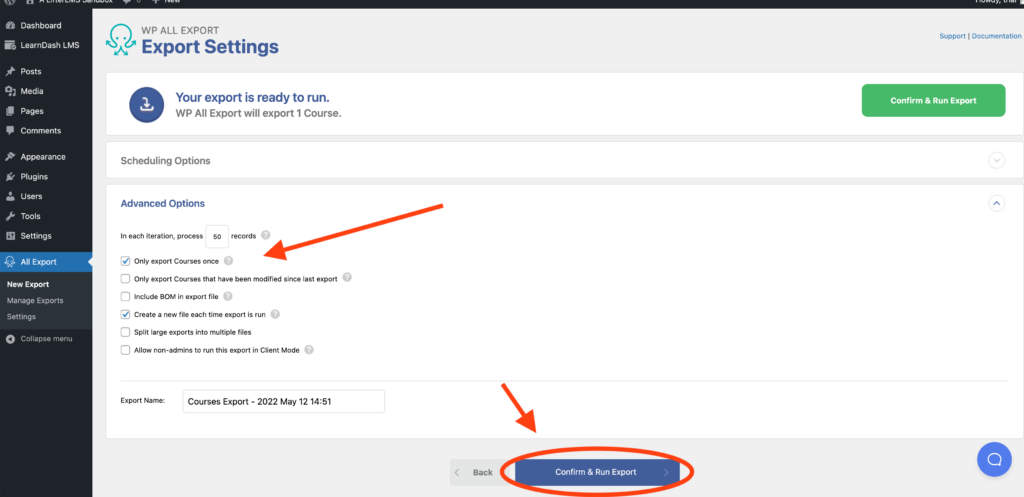
Step 6 – If you’re exporting a large number of files, you may want to configure the Advanced Options to suit your export for what your site can handle and run a few exports. Click, Confirm & Run Export.
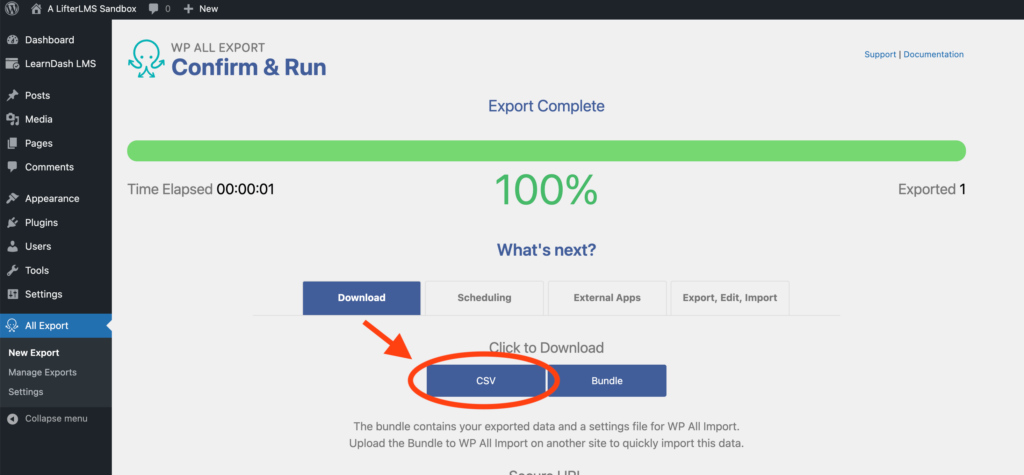
Step 7 – Download your export file as a CSV.
Importing your Courses to LifterLMS
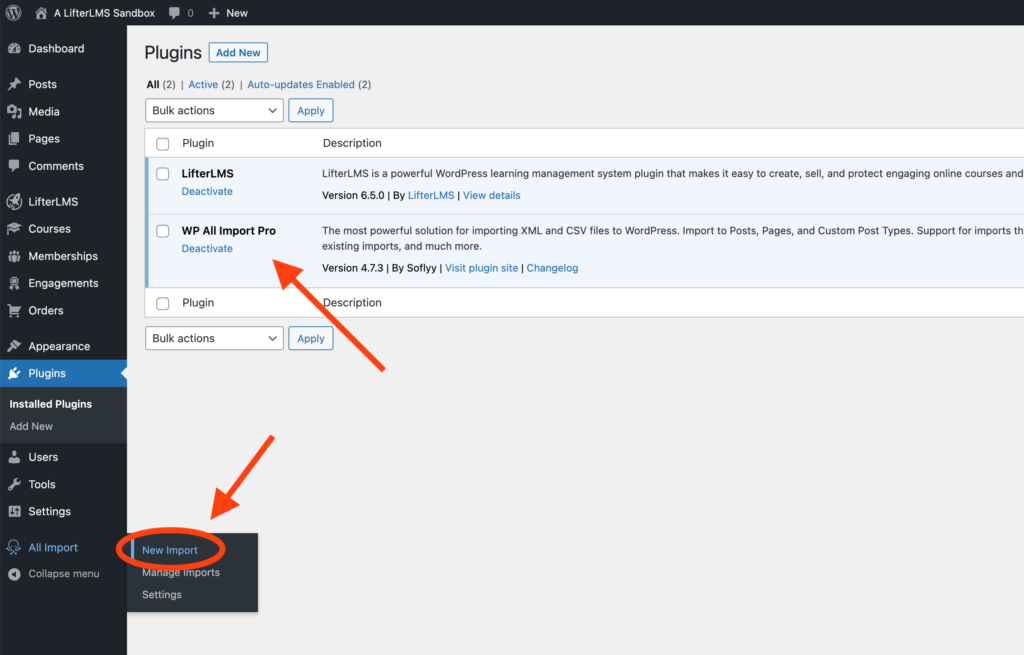
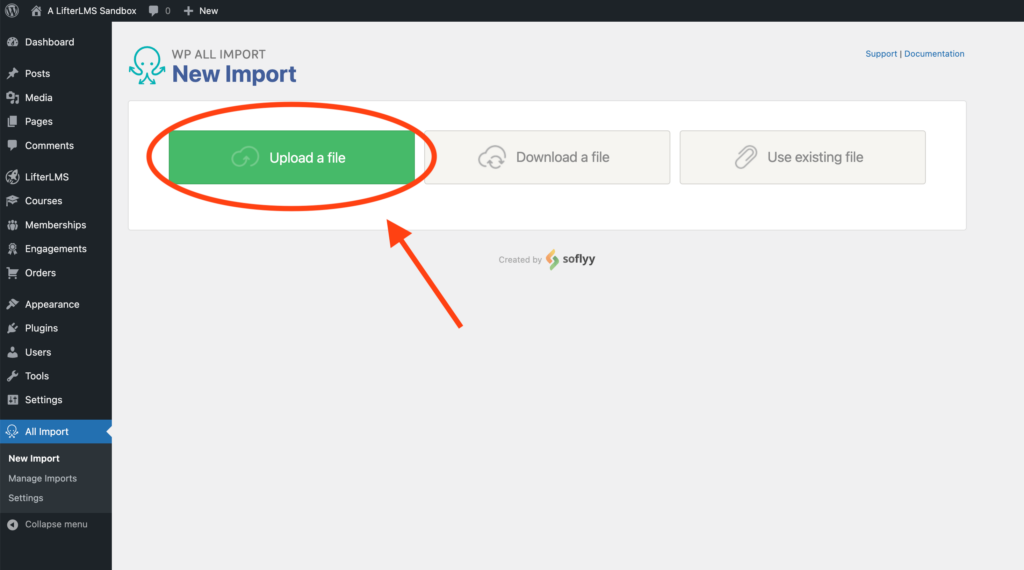
Step 8 – Now, we’ll move over to our LifterLMS site. Make sure you have the WP All Import Pro plugin installed on your LifterLMS website, then head to wp-admin > All Import > New Import.
Step 9 – Select Upload a file and select the CSV file we downloaded from the LearnDash website.
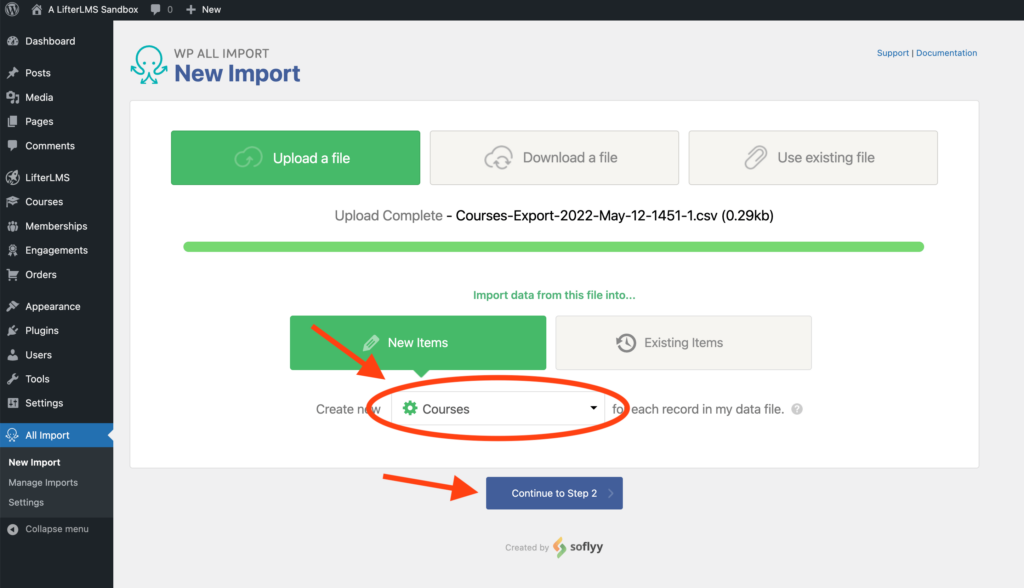
Step 10 – We’d like to import as LifterLMS Courses, so make sure you have the Courses post type selected, then Continue to Step 2.
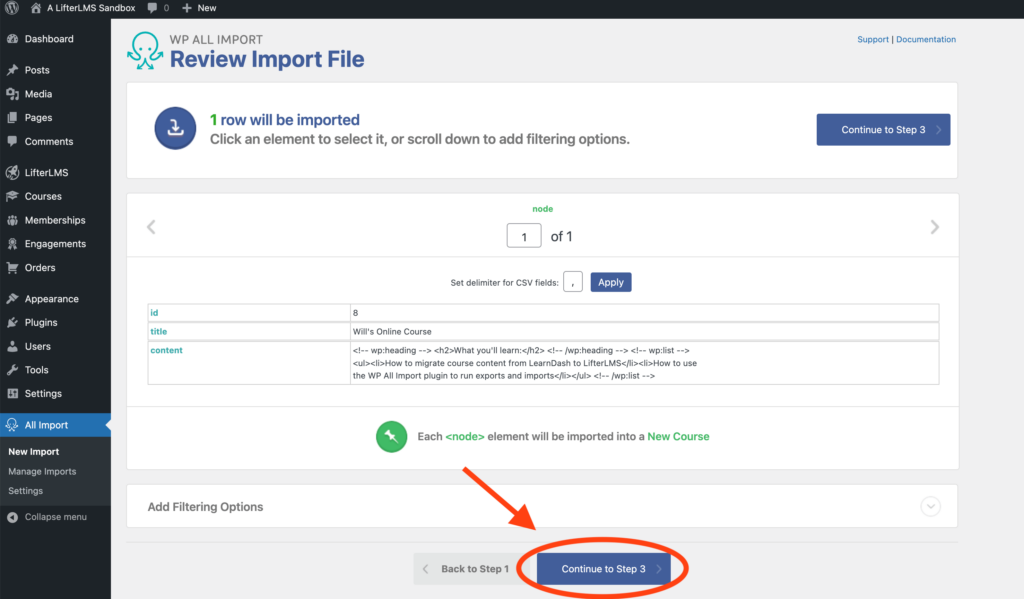
Step 11 – Continue to Step 3.
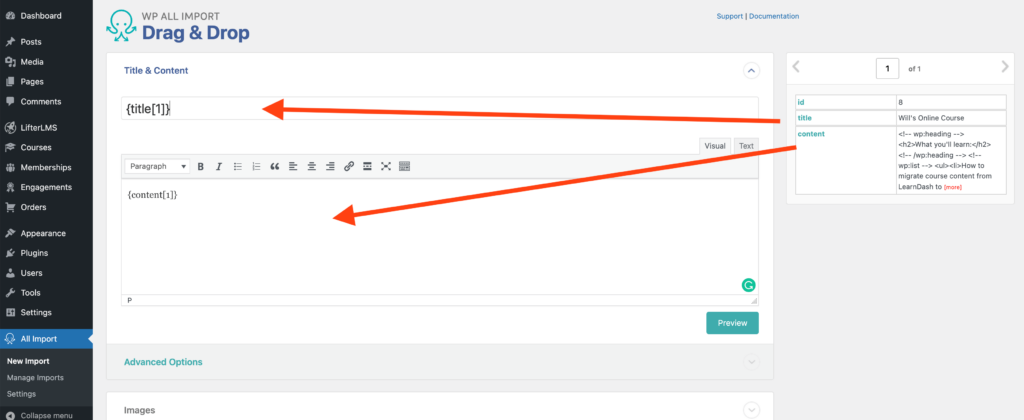
Step 12 – Drag and drop your Title and Content tags over into the correct fields for our imported posts.
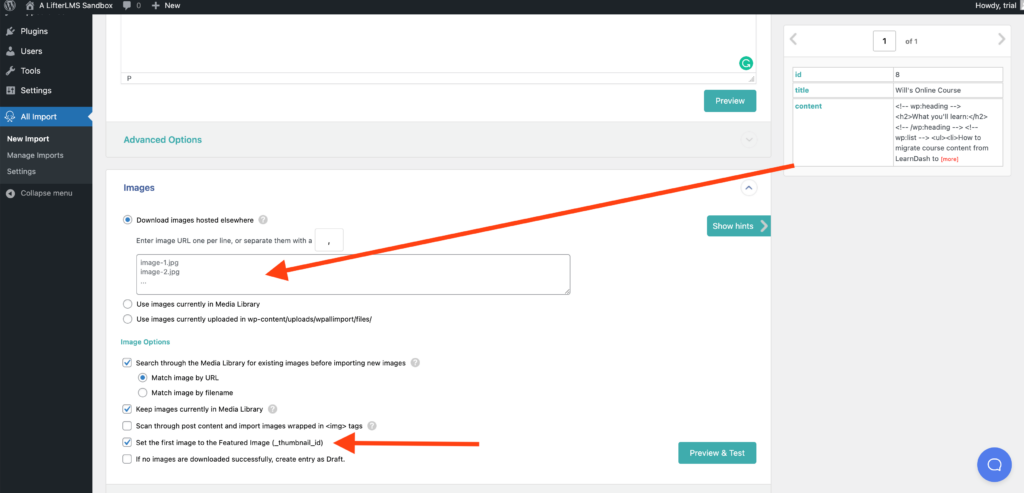
Step 13 – For Featured Images, you’ll want to drag that tag into the Image area below and then make sure the option is checked titled Set the first image to the Featured Image.
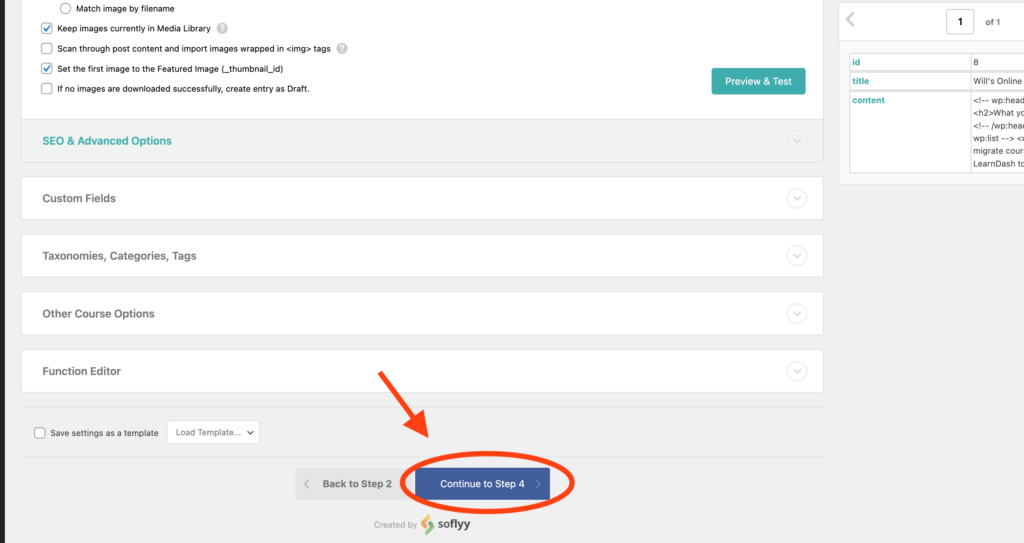
Step 14 – You can map any additional fields if you’re working with custom fields or taxonomies, then click Continue to Step 4.
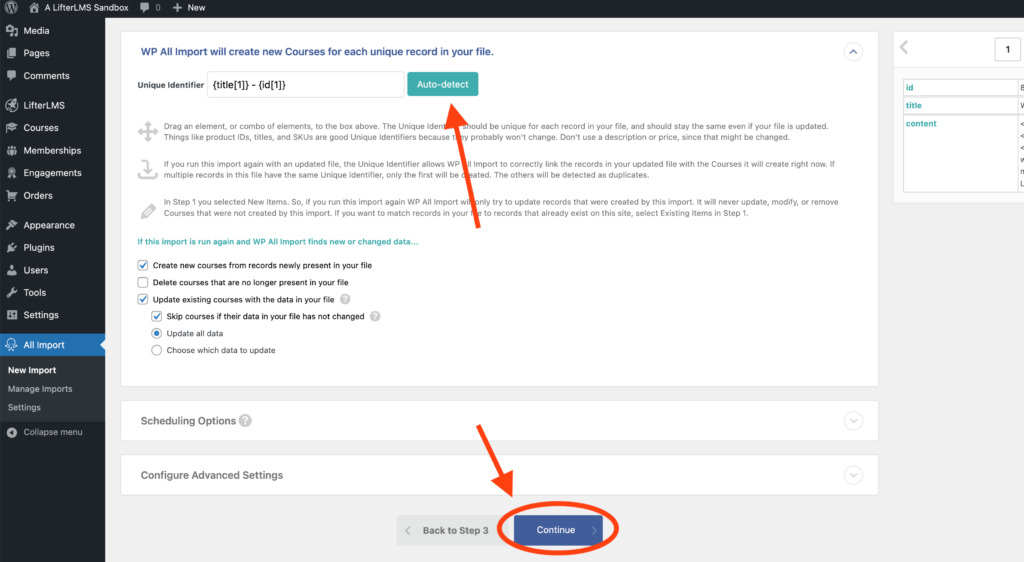
Step 15 – Auto-detect the Unique Identifier for your courses, then Continue.
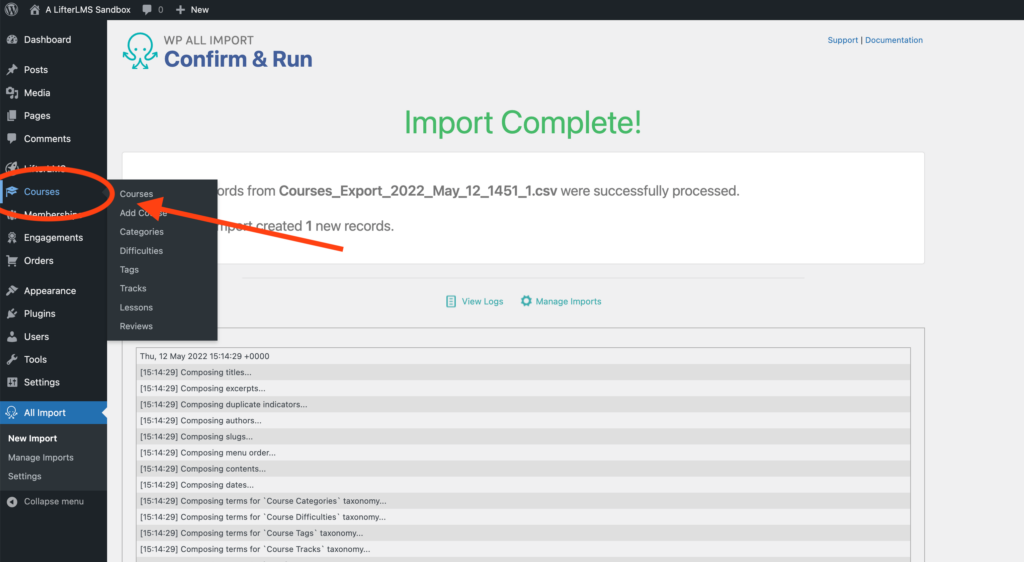
Step 16 – Click Confirm & Run Import.
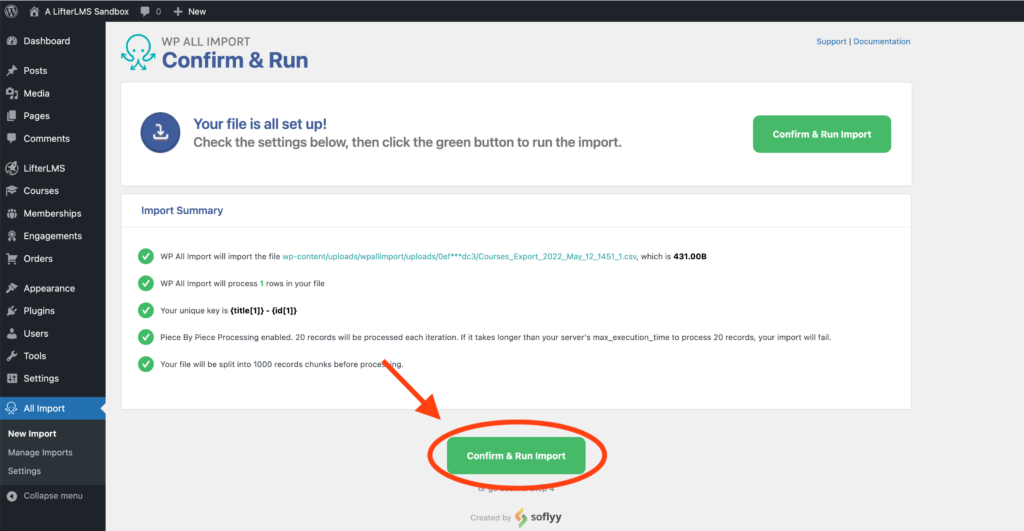
Step 17 – You should see the Import Complete! message, then navigate to the wp-admin > Courses area to make sure all your courses were imported successfully.
Now run the same export and import process for lessons.
Step 18 – You’ll want to repeat steps 1-17. But instead of selecting Courses, you’ll select Lessons when you export from your LearnDash website and when you import to your LifterLMS website.
Add Filtering Options on your export in order to select lessons from a single course if you’d like to do one course at a time during your Learndash migration.
Now that we’ve imported our lessons, you’ll notice, that the content is there, but they don’t have an associated Course or section.
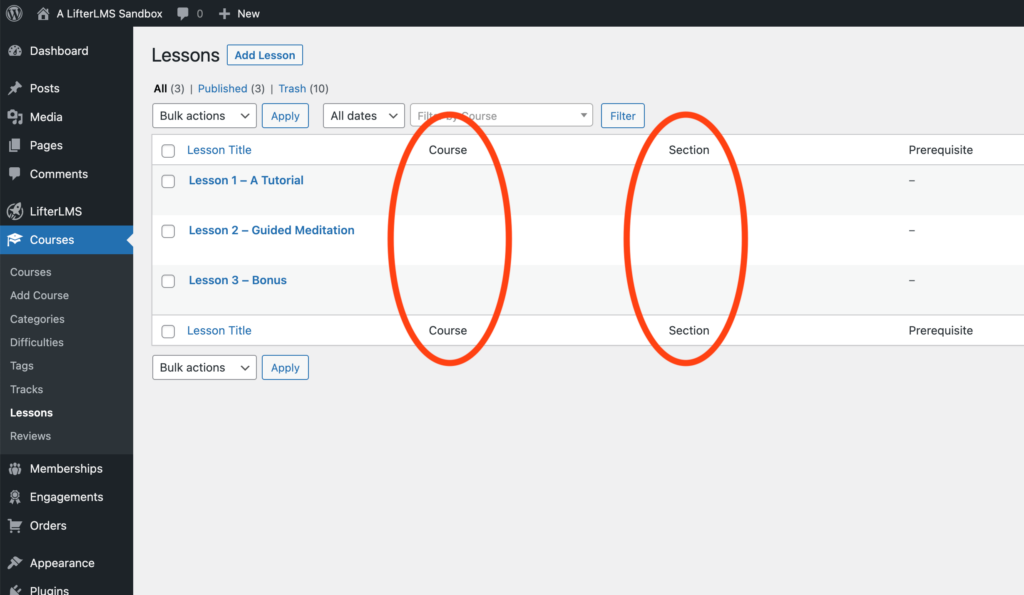
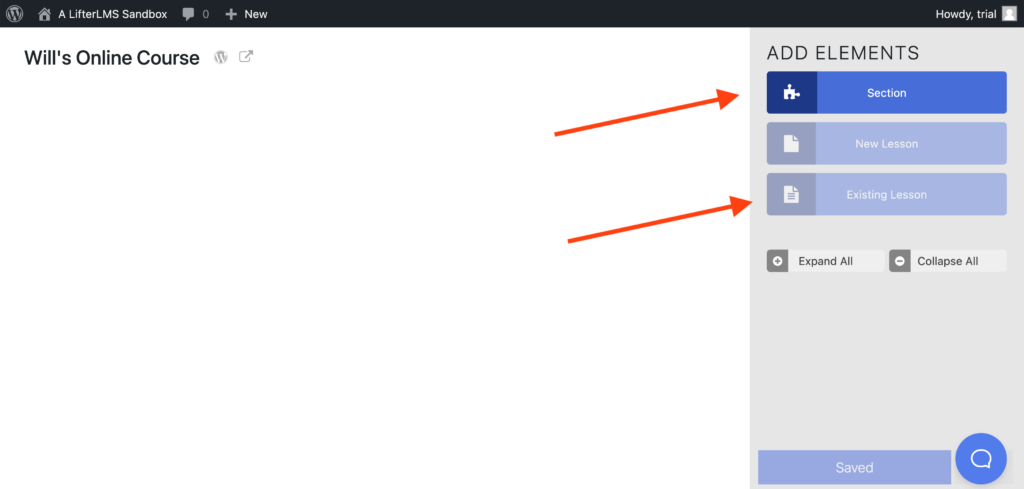
Step 19 – So our last part in the process is to add them to our course. Head to wp-admin > Courses > ‘Builder’ on your course.
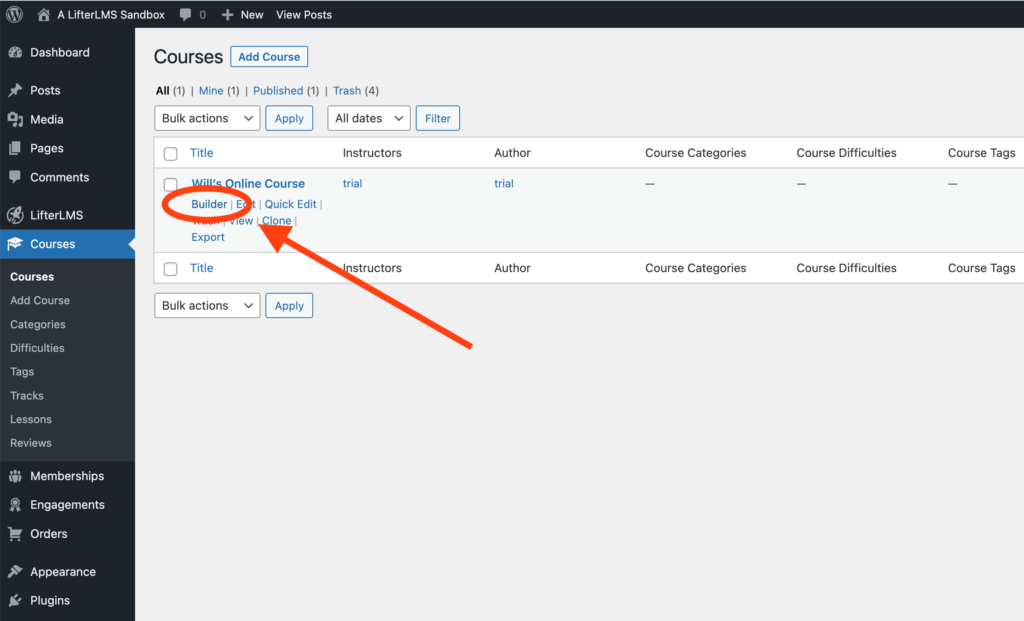
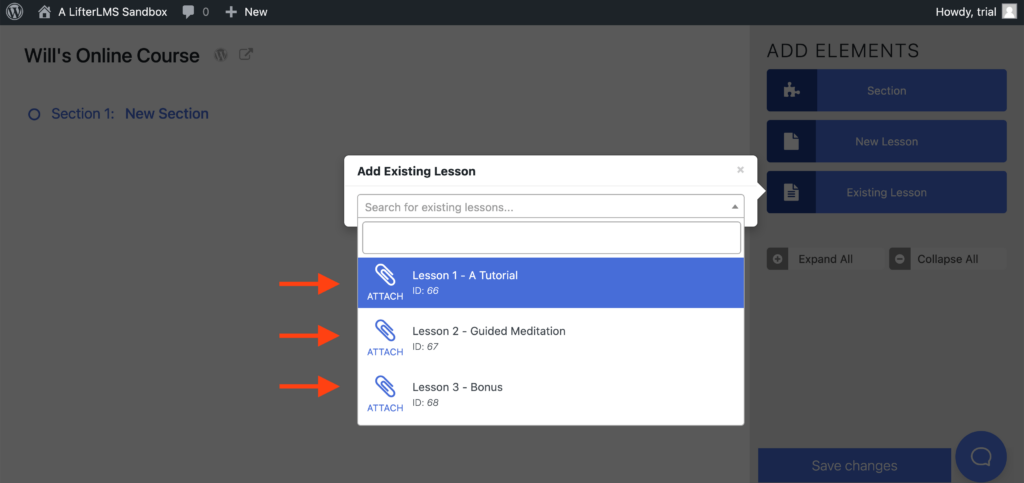
Step 20 – Add a Section to your course and click Existing Lesson.
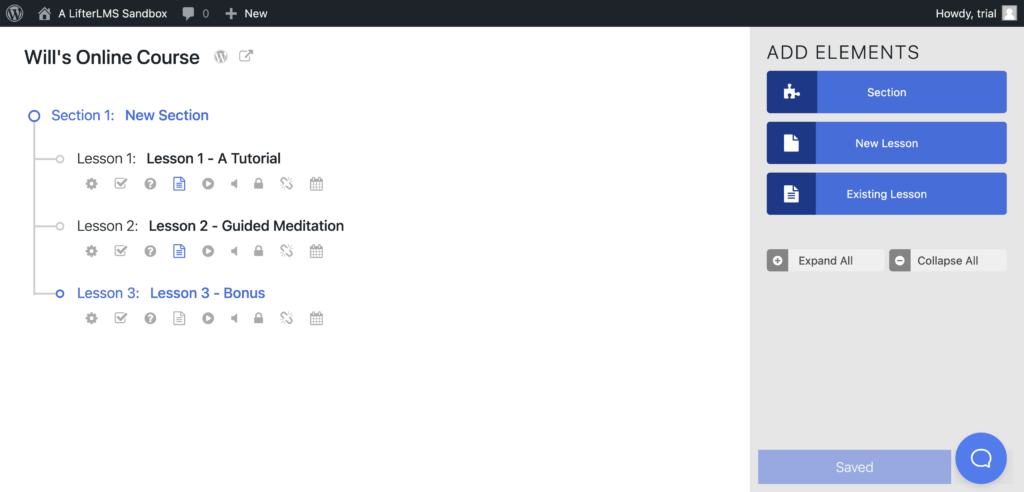
Step 21 – Attach all your lessons to your course (at LifterLMS, we refer to these as floating lessons that aren’t associated with a course).
Once all the floating lessons are associated with your course, you’re good to go! You’ll want to view your course, possibly add in some course information, and check on your lessons. That’s how you complete your LearnDash migration to LifterLMS.
Your Learndash Migration to LifterLMS Next Steps…
That’s it for how you can migrate LearnDash courses and lessons to LifterLMS using either Transfer by Honors WP or WP All Import.
If you don’t have LifterLMS yet, go ahead and download the free LifterLMS plugin here.
If you would like to hire someone to do the migration for you, check out these third-party LifterLMS experts available for hire, many of whom specialize in Learndash migrations to LifterLMS.